
This month I am so excited to be guest designing for the lovely Danielle over at the Creative Retreat Kits blog.

This month over on their blog I will be creating 2 projects using the Septemer "Blue Moon" Main Embellishing Kit. I love, love, love this kit and the navy with the pops of pink and yellow.

So I have already posted my first project over on their blog but I thought I will share it here too. I love how it turned out and I can't wait to share my second creation using this kit later this month.
Lydia xxx
---------------------------------------------------------------------------------------------------------------------------------------------------------------------
Hello creative people, I am beyond thrilled to be guest designing for Creative Retreat with this month’s gorgeous kit. I am total love with the gorgeous blues with the pops of pink and yellow.
So let’s start by getting to know me a little bit.

I am Lydia Gibson, a 14 (turning 15 in a few weeks) year old creative teenager who has a huge passion in documenting her everyday. I live a small country town in south-east Queensland, Australia with my parents and younger sister. I currently love to document my everyday through my love of photography with Project Life, Traditional 12×12 layouts and lots more.
Today I’m sharing a traditional 12×12 layout using the beautiful embellishments from the September kit. I love how it turned out!

I have currently been loving the Paige Evans ‘Fancy Free’ collection. When I first saw which kit I was getting I just knew I had to use those papers. So I layered some of Paige’s beautiful papers behind my photo to give it some extra pop of yellow and pink. You may be able to slightly see that I have done a light pink watercolour behind the photo also.

Once I had layered paper behind my photo and added some watercolour to the background I started embellishing with the gorgeous PinkFresh Studio puffy stickers which are in this months kits. I love the texture these puffy stickers bring to the layout. I also added some of the exclusive chipboard shapes that are also in this kit.
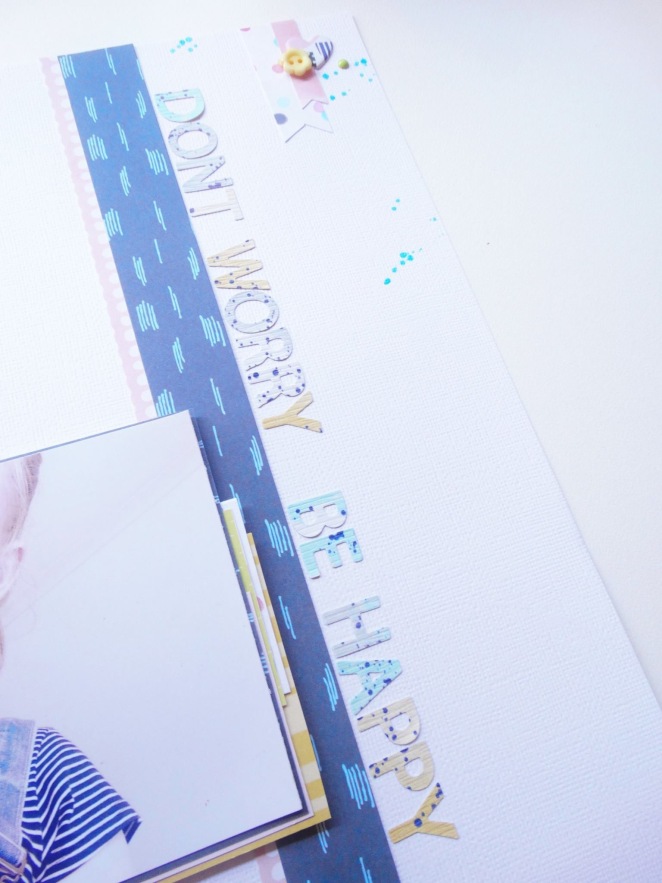
I did add some strips of paper down the page and added my title with those beautiful water coloured, splattered alphabet from PinkFresh Studio down the page, in which I don’t normally have my title like that. but I love it!!
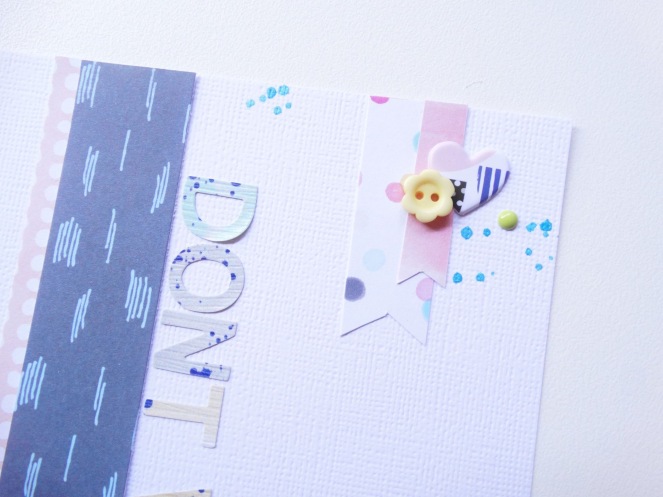
I did add a small little cluster in the top right corner with some paper banners and one of those PinkFresh puffy sticker hearts. I also added an enamel dot and button from my stash.
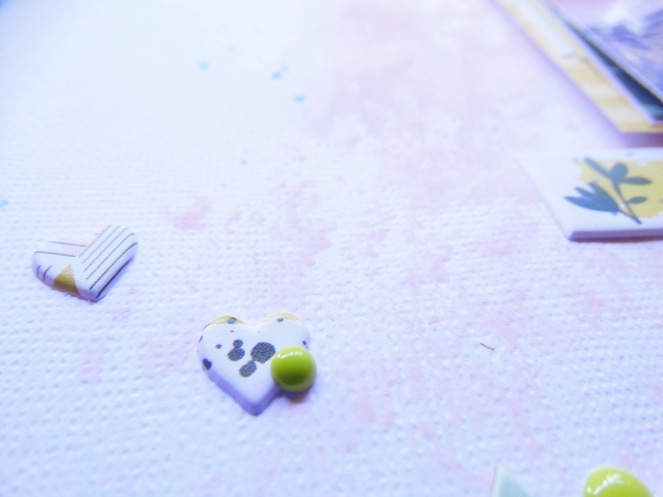
And lastly I did another little cluster at the bottom left. I also added some navy splatters to compliment from the alphabet title print.
So I hope you enjoyed this layout as much as I did creating it. Be sure to grab one of this months gorgeous kits to have a creative time with. I will be back later in the month with another project.
Lydia xxx
Instagram: @lyd_gibson